An email you can read right now
Sign-up uses a one-time passcode sent to your email. The code expires after a few minutes.

This tutorial takes you from no account to your first transcribed and tagged Session item. You’ll do four things: sign up, open a Session, upload a WAV, and add a Property. No prior VoiceQC knowledge needed.
An email you can read right now
Sign-up uses a one-time passcode sent to your email. The code expires after a few minutes.
A short WAV file
Any WAV. A 5–30 second clip transcribes quickly and is enough to see the full flow. If you don’t have one, grab any voice-over WAV from a project you’re working on.
Visit voiceqc.com and click Sign Up in the top nav.
Enter your email and a password, then click Continue.
Open the email VoiceQC just sent you and copy the one-time passcode. Paste it back into the sign-up form and click Continue.
Optional: when prompted Keep me signed in?, choose Yes if this is your own machine. Otherwise choose No.
You land on the Session page. The top nav shows Session, Logs, and Usage links — that’s how you know you’re signed in.
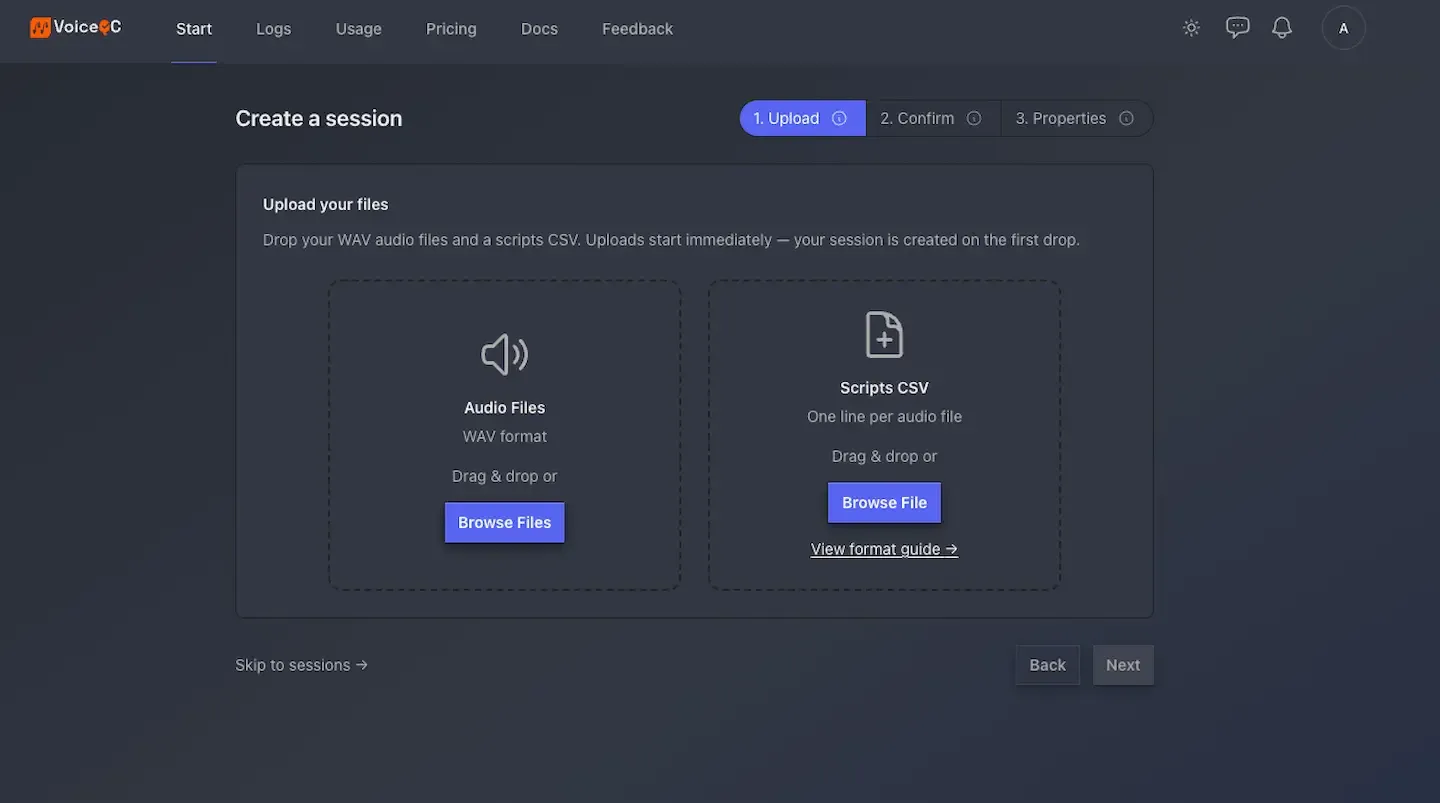
Drag a WAV file from your file manager onto the Audio Files drop zone, or click the drop zone and pick a file. Only .wav files are accepted today — other formats are silently filtered out (no rejection message; the file just doesn’t appear in the Session items table).
If you have a script drag the CSV file from your file manager onto the Scripts CSV. Click View format guide for info about the format of your CSV.
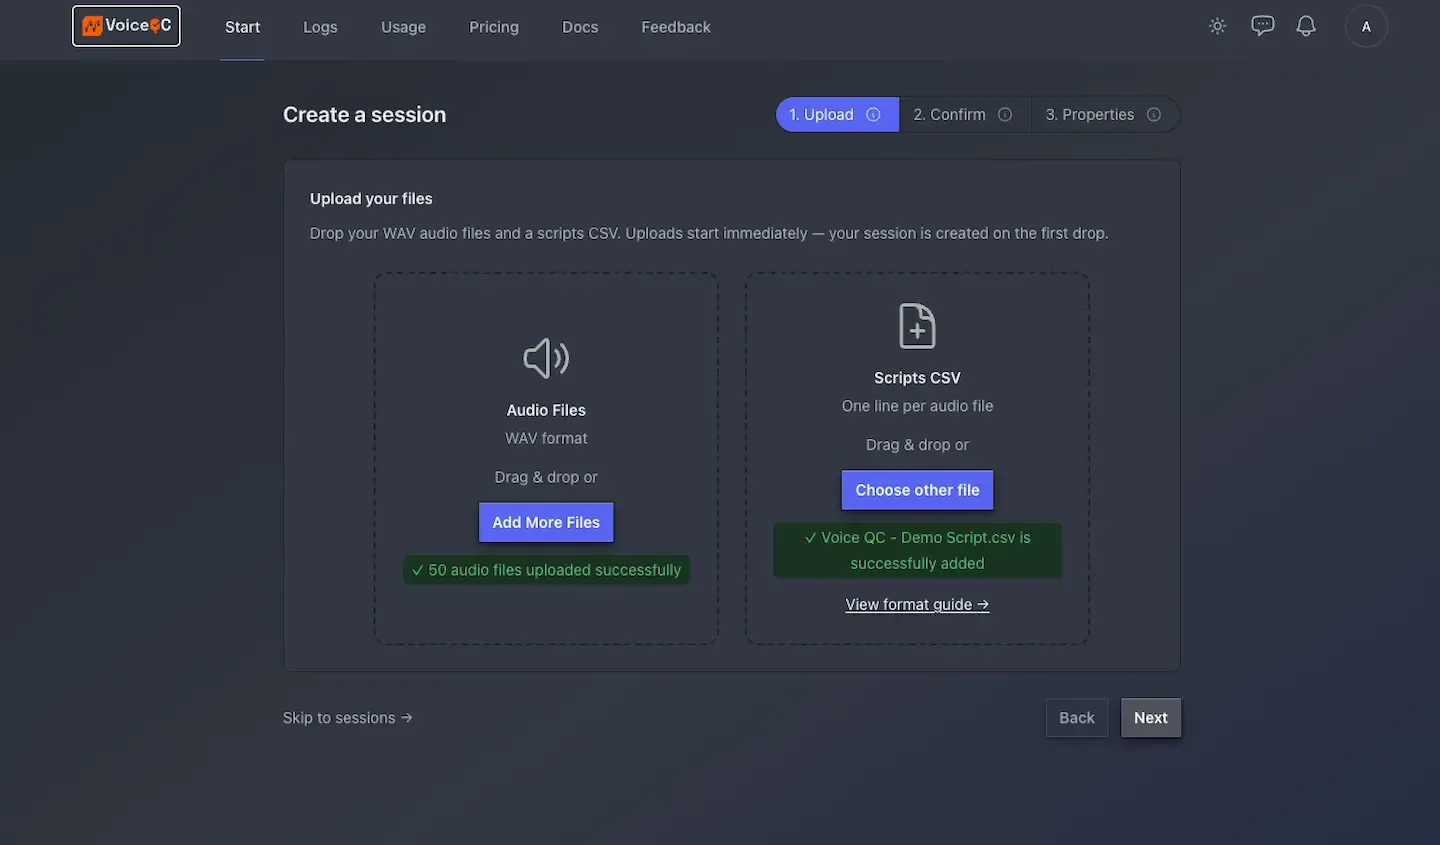
Once files have been uploaded click next to move to the Confirm screen.
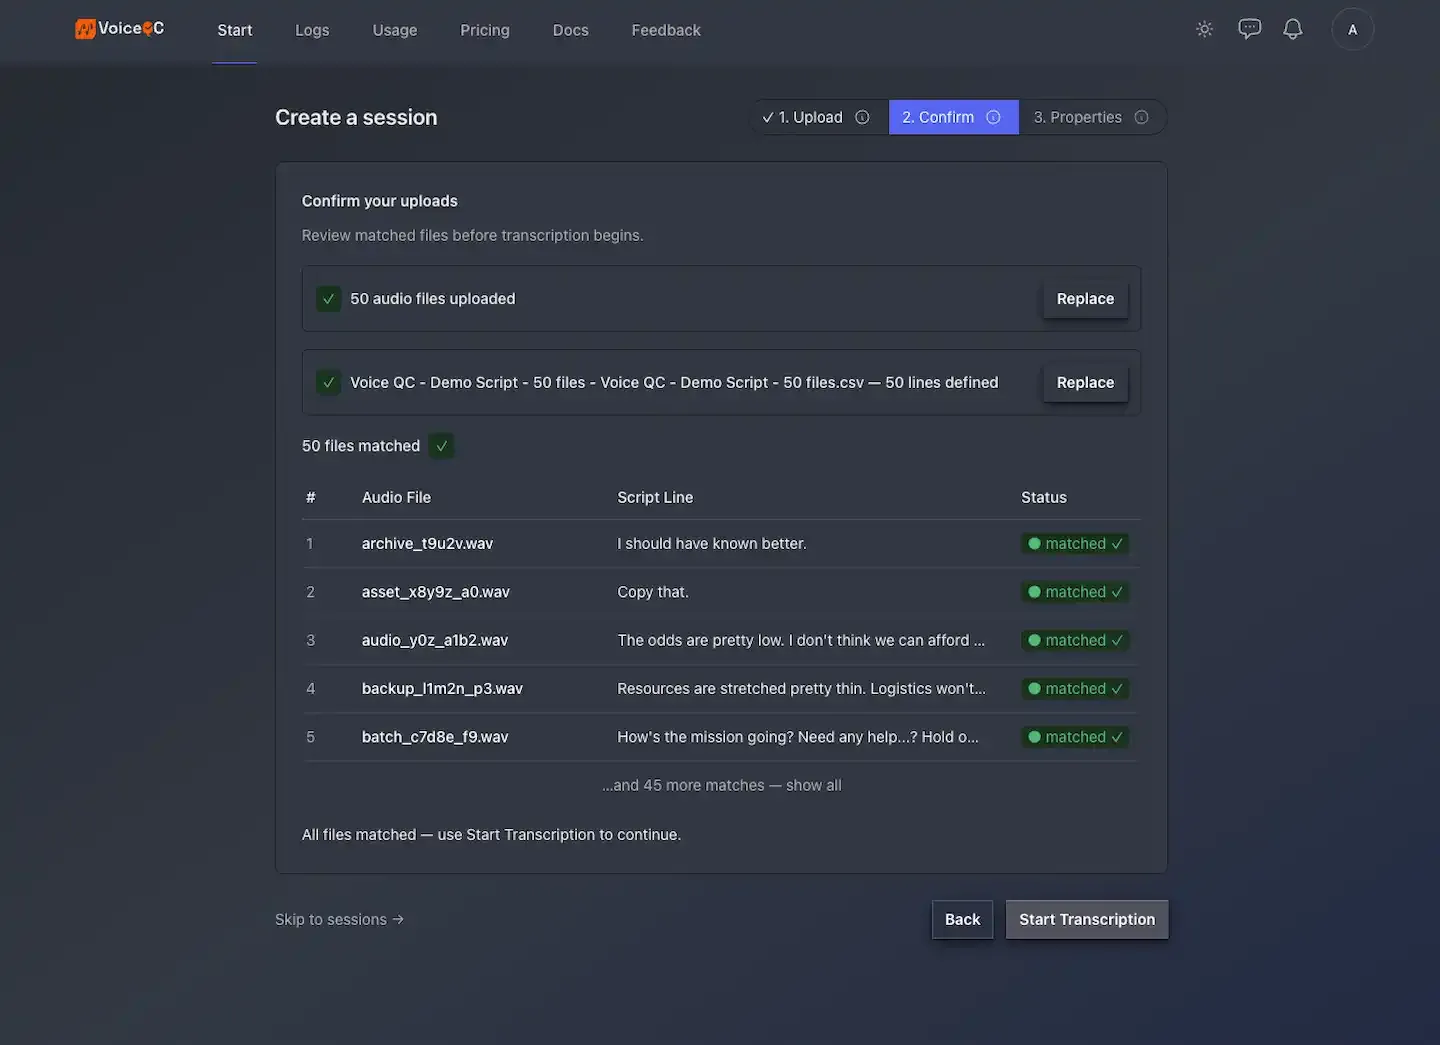
You should now be looking at the Confirm screen which is an intermediate step before starting the transcription. This screen allows you to verify you have added the expected number of files and lines of dialogue. If everythinkg is looking good then proceed to click Start Transcription
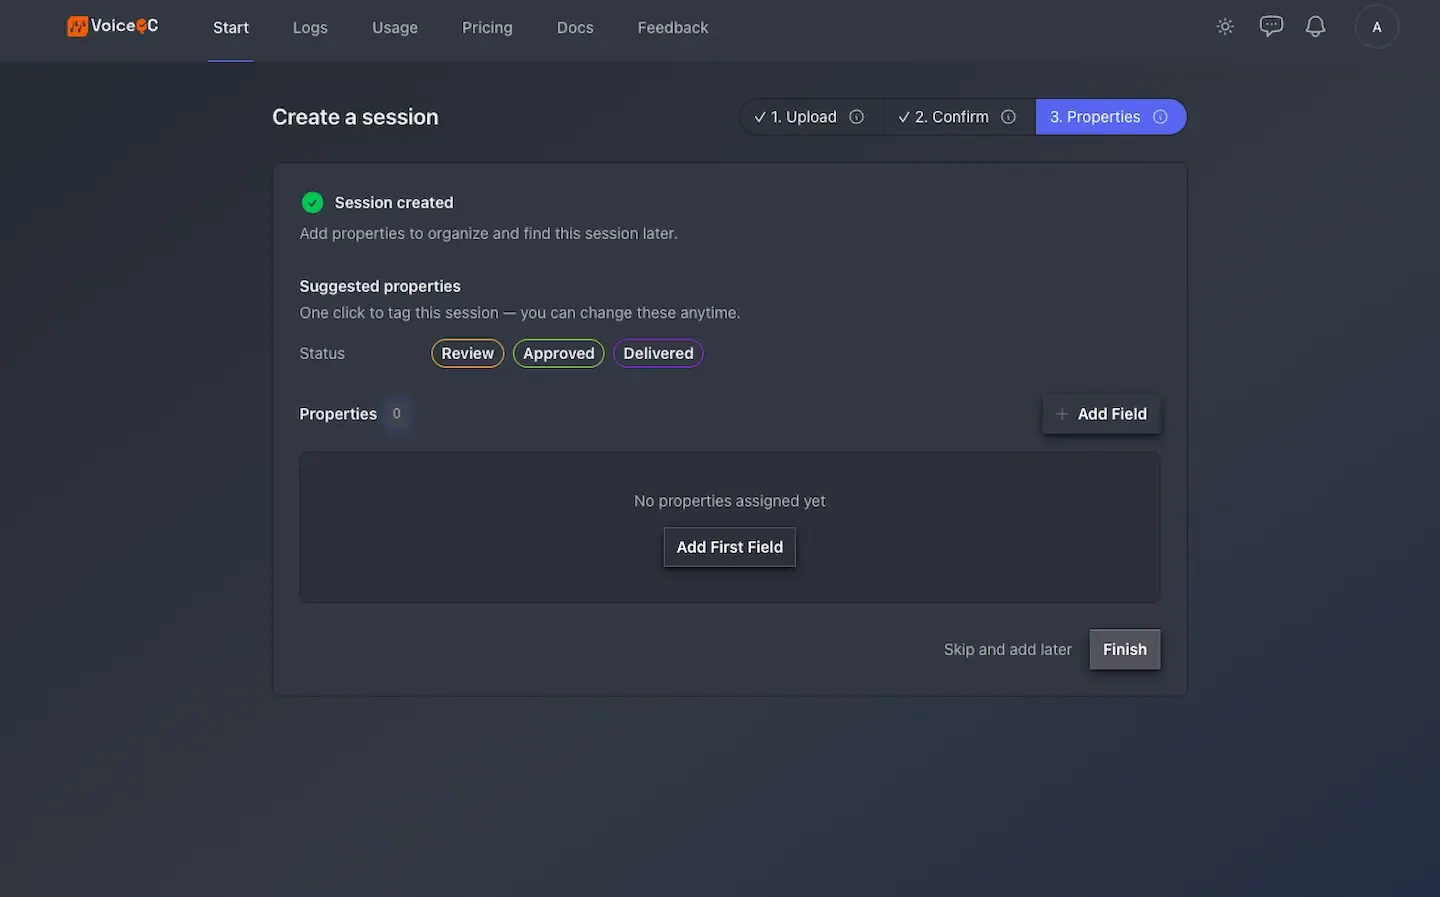
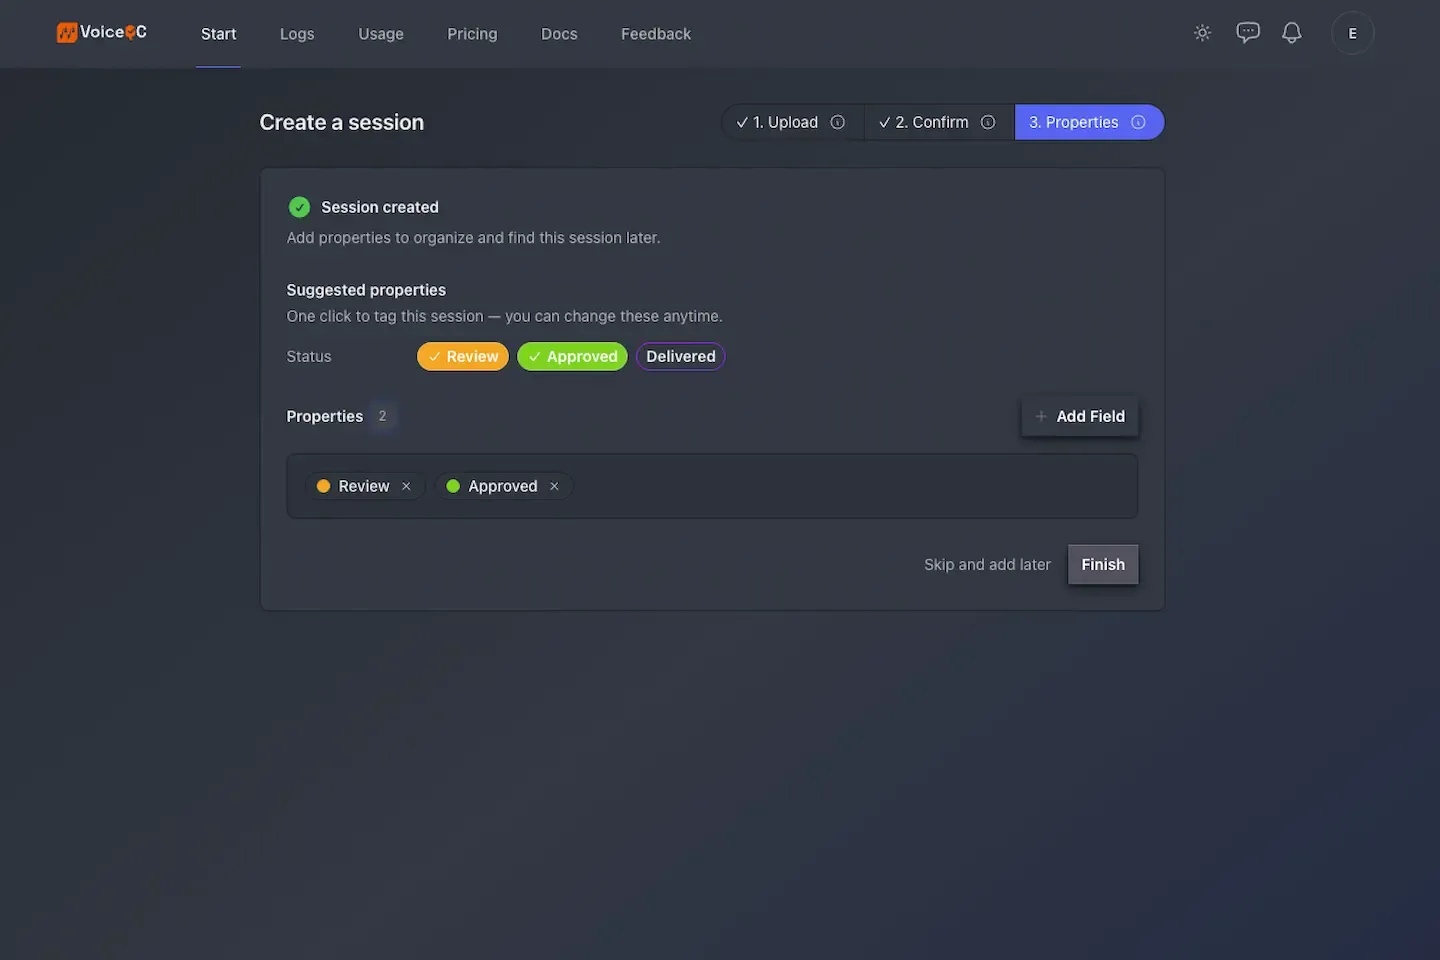
A Session Property is a piece of metadata you attach to a Session — for example, Status / Approved. Properties are structured as a Name / Value pair. A property can show the status of these files ( Review, Approved ) or other informaton such as character names, projects titles or anything else that would be useful.
Upload more audio
Read the Upload audio files how-to for what’s supported, what isn’t, and what happens to files behind the scenes.
Build your Property library
The Build your Property library how-to covers Name/Value design and when to add a new Name versus extending an existing one.
Share what you've got
The Share a Session tutorial shows how to send a read-only magic link to a teammate or external reviewer.
See the full glossary
The Glossary defines every term — Session, Property, Auto-rule, Share, Usage period, and more.